


.png)


Now that you’ve taken some great photos, it’s time to bring the best out of them through editing. Editing is an instrumental part of photography and creating great photos and is especially useful when used to make up for limitations in equipment — like using a smartphone camera — or challenges from the environment, such as low lighting. When editing a photo, less is more. Instead of trying to create something different or new, think back to how the moment captured appeared and felt at the time. Simple editing can bridge the gap between what you saw and what your camera captured. Below we’ll walk through some key editing techniques.
Pick a winner
Before you start editing, take a look through any alternate shots you may have for that photo. If you took a live photo, you can choose different frames from a photo to best suit your needs. When picking your favorites, try to avoid ones with issues that are more difficult to fix with editing such as blurriness, cropped out key areas, or overexposure (bright images where the highlights are so bright there’s no detail).

Brightness
Once you’ve found the perfect shot, let’s start with some lighting adjustments. When adjusting your photo’s brightness, look for the brightest parts of the photo first: do they seem darker or brighter than they would in real life? If so, make some adjustments starting small while keeping an eye on those bright spots. Most photos don’t have a pure white spot unless a bright light or the sun is captured in the photo, so don’t go too bright and aim for what feels true-to-life!
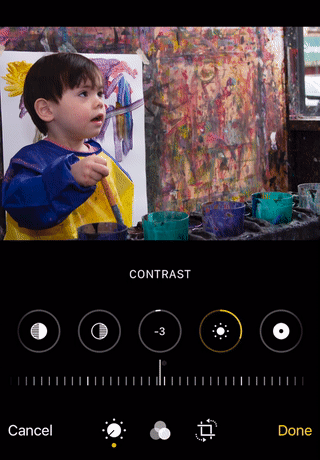
Contrast
Next, we’ll adjust the contrast of the photo. Contrast is the difference or intensity between light and dark spots in an image. Before we start, look at your image again and consider: does the photo look washed out? Are the shadows too harsh? Does the photo feel flat? Since we just adjusted the brightness, for this step we’ll want to look closely at both the lightest and darkest spots of the photo as we adjust. If you have shadows covering important parts of your image, you’ll want to reduce the contrast so those areas can be seen more easily. If your photo looks flat or washed out, you’ll want to increase the contrast which can add depth and clearer details. Most photos can benefit from a small increase in contrast, but again be careful not to go far in either direction as high contrast images can look unrealistically moody or surreal, and low contrast images can appear flat or discolored.

Highlights and shadows
For our last lighting adjustment, we’ll refine what we did in Brightness and Contrast using Highlights and Shadows adjustments. These tools adjust the light or dark parts of the image respectively without affecting the other. The highlights adjustment is best used to slightly bring down the brightness on an overexposed image or to make the light parts of an image pop without making other areas too bright. The shadows adjustment is a hugely helpful tool to brighten shadows that may be cast across a face or other important parts of an image. If the darker parts of your image seem too bright after you adjusted the brightness and contrast, use shadows to darken those areas.
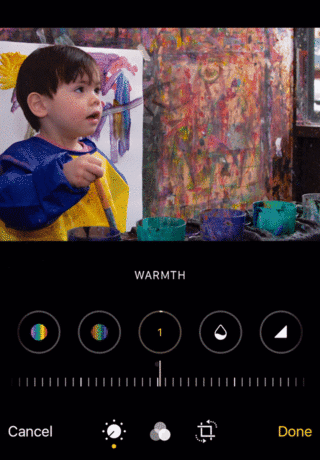
Warmth
Now that our image is spectacularly lit, let’s make some color adjustments. First, we’ll start with warmth, which, as the name suggests, will change the overall colors of your image from cool (blueish hues) to warm (orangeish hues). Before you start, try to figure out if your image looks “cool” or “warm” to you now, and think about what the lighting looked like when the photo was taken. An easy way to do this is to find a white or grey part of the photo and see if that white or grey object looks orange (warm) or blue (cool). If a photo is cool — often due to fluorescent or LED lights, shade, cloudy weather, or the mid-day sun — increase the warmth to a color that feels realistic and appropriate. If the photo is already warm — often due to tungsten/soft light, low-light or ambient light settings, sunsets, and sunrises — try reducing the warmth to see if it feels more true-to-life. As a general rule, slightly warmer photos tend to look more flattering and feel more joyful and inviting, which is often appropriate when marketing children’s activities.
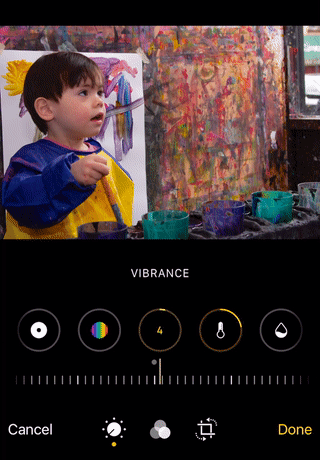
Saturation and vibrance
Next, let’s bring these colors to life! Now that you’ve adjusted the warmth, look at your photo and ask yourself whether the colors look full and intense or dull and washed out. The difference between the Saturation and Vibrance adjustments is subtle but important: Saturation adjusts the intensity of all colors, while vibrance adjusts only the intensity of colors that appear muted in the image. If the colors in your photo are so intense that you’re losing details — which is often the case with very warm images — try slightly reducing the saturation or vibrance to regain some of that detail, while being careful not to make your photo look washed out. More often than not a photo will benefit from a small increase in saturation or vibrance. To do this, I recommend starting with vibrance and increasing it by small increments until your colors feel more true-to-life. If vibrance isn’t helping, try increasing the saturation slightly — this will have a more dramatic effect and can easily be overdone, so adjust in small increments with care.
Sharpness
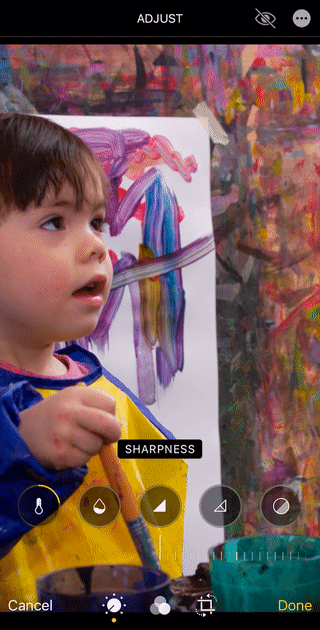
Your photo is shaping up wonderfully now, let’s put on the final touches. Increasing sharpness will make an image look less blurry and clarify details. Most photos can benefit from a small sharpness adjustment, but sometimes sharpness can create harsh, pixelated edges or flatten the depth of your image. Zoom in on some in-focus details, if they look crisp, you can skip this step, if they’re a little blurry, increase the sharpness a tiny bit.
Cropping and straightening
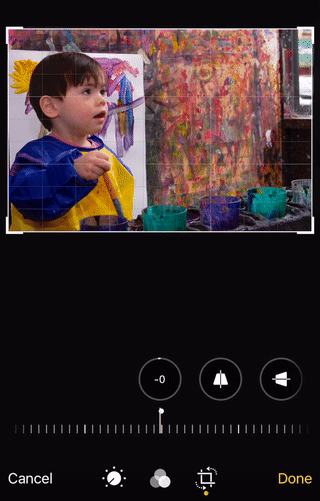
Now that your photo is in top form, it’s time to make the framing just right. First, make a duplicate of your photo first in case you need a wider view later on. Before we crop it, make sure the photo is straight. To start, look for straight edges like the horizon, the edge of a building, or the corner of a room, then rotate your image to align these edges to the grid on your phone. Once straightened, think about how you’re using the photo — do you need a square crop for Instagram? A vertical 9:16 crop for a Story? Use the preset crop sizes and resize the crop area keeping what you need and leaving out what you don’t. For more tips on cropping, look at the notes on framing and composition from our previous post on taking photos.
What about all the other adjustment options?
Unless you’re a seasoned photo editor, you should be in good shape if you stick to the above suggestions. If you feel like your photo is still missing something, try out some filters and reduce their intensity to keep the photo feeling authentic and true-to-life. When you’re done with all your edits, make sure to tap on your image (on iPhone) to see the original unedited version to ensure you didn’t overdo it!
Most of what you need is right on your phone, but if you are feeling like taking it to the next level:
- A Color Story - This app allows you to save filters as presets and offers in-app purchases and free filter packs. You can also use this app to batch edit a group of photos.
- VSCO - This app offers many natural filters to help fine-tune your photos with user-friendly editing for photos and videos.
- Lightroom - This tool is for very experienced photographers that want to take your editing on the go: Lightroom offers granular detail adjustments, offers powerful batch editing, and gives you the power to edit RAW format photos.
Ready to start editing your amazing photos? We can’t wait to see what you dream up! Once your photos are complete, share your success with the Sawyer team by tagging us on social @HelloSawyer or sending our team an email at marketing@hisawyer.com


